Bachelor of Design (Hons) in Creative Media, Taylor's University Malaysia
Experiential Design Task 3
Get link
Facebook
X
Pinterest
Email
Other Apps
Melvin Yung Khun Yew | 0357241 | Bachelor of Design (Hons) in Creative
Media
MMD 60204 | Experiential Design Week 8 — Week 11
Task 3: Project MVP Prototype
With the design planning in Task 2 as a foundation, I began to work on the MVP features of our BodyBuddy app using Unity and Vuforia Engine, which I've learned during the tutorial classes. This is where I divide tasks with my other teammate, Lin Si Yan, to work on the individual features in our app.
Building one of the MVP features in Unity
These are the jump links to each part of this portfolio
Mr Razif Mohammed, my lecturer for the Experiential Design
module for this April 2025 semester, gives us a heads-up on the upcoming
tasks and exercises.
MIB - Module Information Booklet
To guide us step-by-step into the AR technology, Mr Razif gave us a
series of in-class exercises that assist us in exploring the current,
popular trend to help us better understand this technology and how we
can utilize it in our upcoming project.
Work Process
In this task 3, I'm working together with my other teammate,
Lin Si Yan, to develop the MVP features in our app.
In my blog, I'm going to share my contributions to this design
project proposal that I've remembered. As in our MVP features of the app, there are the organ info features and the assembly features. Thus, I went on to choose the assembly features as my development direction while I left the organ info part to my other groupmate.
Scene Planning
To separate the different content on the screen with different functions, I mapped out all the scenes I needed for my assembly features for easier management in the future.
1. MainMenu Scene
Homepage with app branding and main navigation
Button to enter Assembly Mode
2. AssemblyTutorial Scene
Welcome screen with tutorial introduction
Step-by-step guide showing how the feature works
Brain mascot
"Next" navigation to proceed
3. PreAssembly Scene
Question interface for organ selection
Multiple choice buttons for organ pairs
Feedback system (correct/incorrect responses)
Progress tracking for different organ groups
5. ARAssembly Scene
Model dragging interaction to combine
Vuforia AR camera integration with ground plane stage and image target
Half-transparent organ silhouettes overlay
Real-time model detection and tracking
"Check Assembly" interaction button
Process guidance messages
6. CompletionFeedback Scene
Success celebration screen
Progress summary
Return to the main menu
Different scenes in Unity
Assets Building and Importing
In this scene, I have imported the graphic and UI assets from the Figma files developed back in task 2 to Unity, including the mascot, human body, and organ images as well as the UI.
Assets preparations
Assets imported and categorized in Unity
I've also imported free 3D models of organs, which were downloaded from the SketchFab website, that will be used during the AR sessions in this assembly feature.
I also took the chance to use the Unity Asset Store and search for the FX kit and UI sound effects pack that I planned to use at some point in the development.
Assembly Tutorial Page
In this scene, I aligned the position of the gameObjects like the panels, text, and buttons based on the visual and UI assets that I've imported into Unity to ensure a responsive UI later when I export and build the APK files to my phone.
I also code a script out to determine the setActive of gameObjects like the panels and texts to allow a page switch between the introduction and details in the same scene.
Object Toggler script
To make the visual guide animations the same as planned in Task 2, I utilized the animation tools in Unity and keyframed the positions of the organs' sprites on the screen.
Keyframe animation for the organ graphics
PreAssembly Page
This page is where users need to choose the correct answers by clicking on the respective icon buttons.
Here I have included different scripts that help to make the page functional, by controlling the answering logic (User must choose 2 options to continue) and the feedback panel toggle on right and wrong conditions.
Selection Manager script
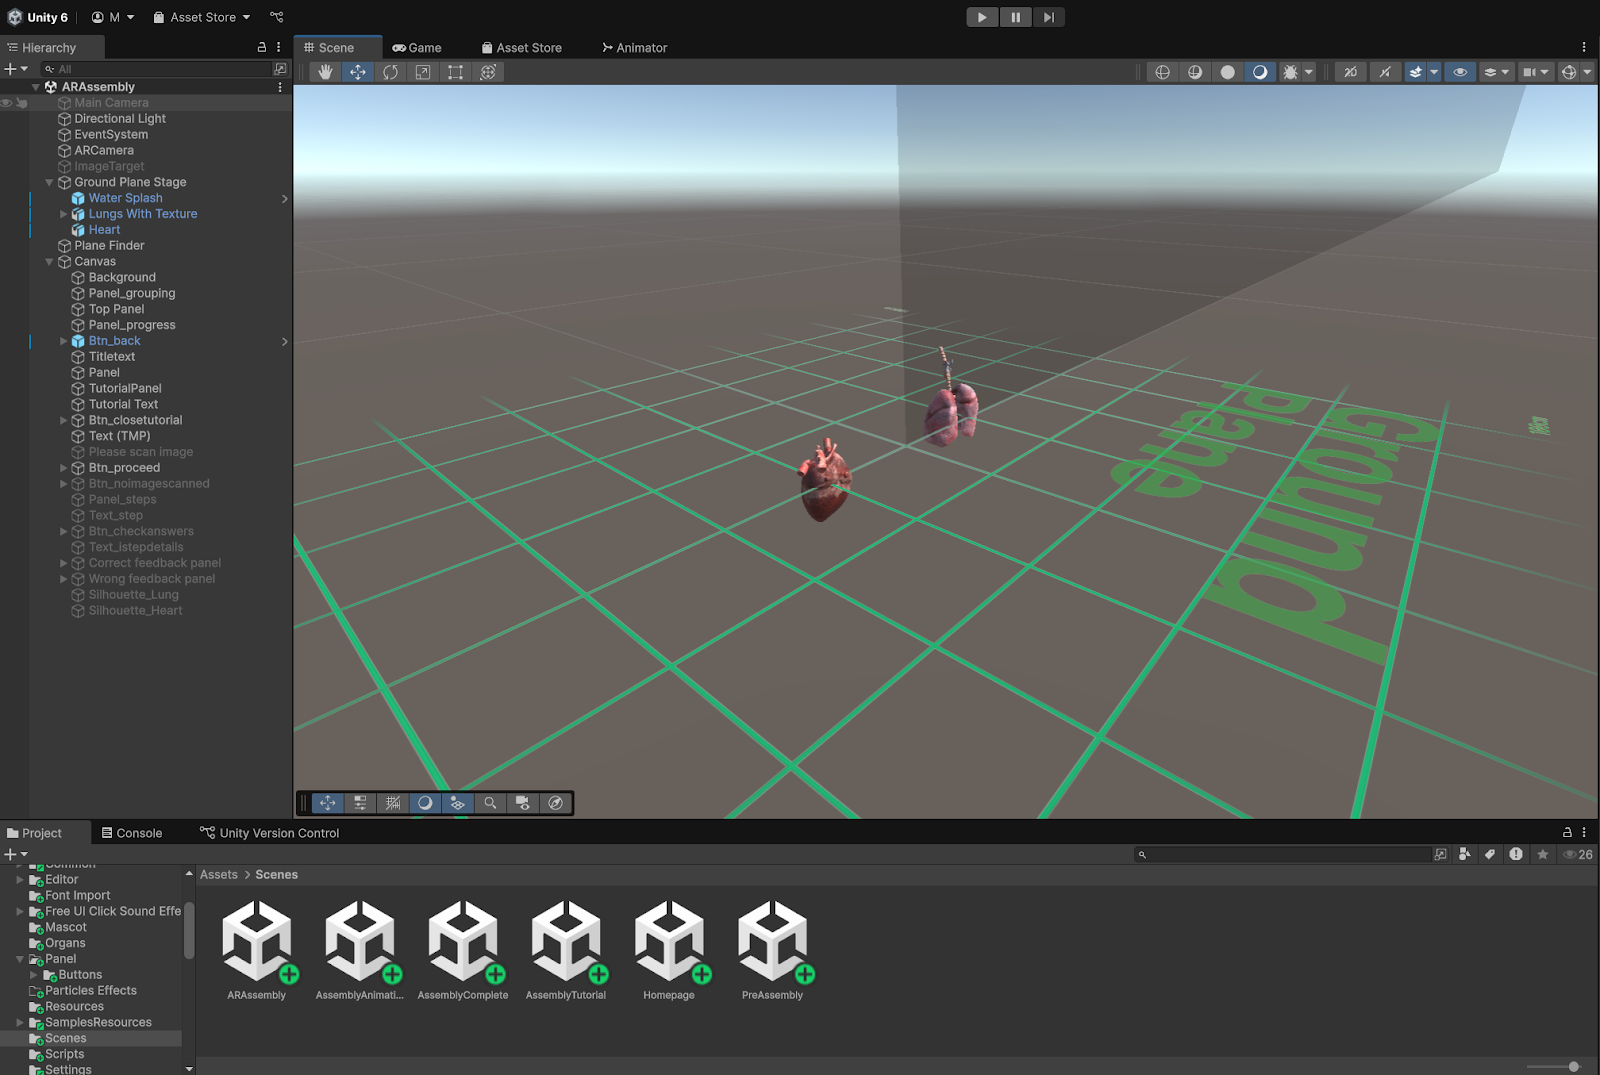
ARAssembly
This page is where the AR experience begins, which requires the user to search for a ground plane to interact with the 3D organ models and try dragging them together to combine them, which acts as a visual tutorial for the users.
Originally, I planned to use the model target tracking in Vuforia to allow the assembly organ combination and check whether the physical organ models combined are correct. Due to the fact that now model target features from Vuforia are locked behind a paywall now, I can only resort to using the image target function to mimic the interaction here.
The AR assembly mode is separated into two sections:
Model dragging interaction
Image target checking
Ground Plane and Image Target Tracking with Vuforia Engine
This page is the most complex and tricky part in this whole assembly mode feature, as I spent a lot of time trying to implement and fix the model dragging issue on the screen, as well as the image target detection logic to show whether the correct or wrong combination of organ models is shown.
All those scripts include hundreds of C # coding lines that were written with the help of AI.
These are the scripts that are implemented to enable the functionality:
Script to control the dragging trigger on the 3D model
Interaction Manager script is used when the two organ models collide
Script that controls the toggle of different UI panels (Error panel, Correct & Wrong answer panel)
Assembly Completed Page
This page will show up when the users complete all the assembling steps, which congratulates the user for completing all the assembly and finishes a full combined physical model.
Assembly Complete Page
Scene Navigation
As for the scene navigation, I applied the knowledge I've learned during the tutorial class with a custom script controlling the page index and the scene list numbering in the build profiles. This allows me to switch and navigate between different scenes in my assembly mode features.
C# Script
Scene Navigator
What has yet to be done?
From my perspective, we just left the final features in our BodyBuddy app, the quiz mode that puts the users' organ knowledge to the test by answering a series of questions.
Working on the Assembly Mode for the BodyBuddy app has been quite a ride. I chose this feature because I wanted to challenge myself, especially with AR and Unity, even though I knew it wouldn’t be easy.
One thing I learned is how important it is to plan scenes and assets upfront. Mapping out the different pages, like Main Menu, Tutorial, and ARAssembly saved me from getting lost later when coding navigation and organizing assets in Unity.
The biggest challenge was definitely the ARAssembly scene. My original idea was to use Vuforia’s model target tracking, but it turned out to be locked behind a paywall. That forced me to switch to image target tracking instead. At first, I felt frustrated, but it taught me to always expect changes and adapt my plans.
Coding the dragging interactions and UI toggles took hours of testing and debugging. Sometimes I felt completely stuck, but using AI tools and online forums helped me solve most of the issues. It also made me realize how many hidden details go into making AR features work smoothly.
I’m glad I could bring my Figma designs into Unity and animate the tutorial screens to match our vision. It’s satisfying to see static designs come alive with motion and interaction.
Melvin Yung Khun Yew | 0357241 | Bachelor of Design (Hons) in Creative Media DST 61104 | Games Development Week 12 — Week 15 Task 4: Final Project - Playable Game To mark an end of our game project, I worked together with my other two teammates, dividing the task to work on specific parts of the game for final compilation. This is where I came in to deliver my efforts, responsible for the obstacles and enemies in the game, the luck bar (health based on timer), as well as final game refinements. JUMPLINKS These are the jump links to each part of this portfolio Instructions Final Project Work Process Submission My reflections Instructions Dr Mia Bong Mei Fern , my lecturer for the Game Development module for this April 2025 semester, gives us a heads-up on the upcoming tasks and exercises. MIB - Module Information Booklet To guide us step-by-step into the Unity app, Dr Mia also lectures and guides us every week on the features in Unity with practical knowledge during class. Work Process ...
Melvin Yung Khun Yew | 0357241 | Bachelor of Design (Hons) in Creative Media Collaborative Design Practice Week 1 — Week 5 CDP Project: Redefining The Gluconomy game Starting on the design project, where we're tasked to "collaborate" with the original board game creator from other semesters, from understanding the board game and how it works, and other aspects. Here, we are responsible for redefining the board game by helping the original board game creator to align their goals much better with a visual change. Original "The Gluconomy" Board Game ...
Melvin Yung Khun Yew | 0357241 | Bachelor of Design (Hons) in Creative Media Art Direction Week 1 — Week 9 Defining a Creative Solution for Community Impact For Project 1 of the Art Direction module, my group and I were tasked with developing a creative solution that responds to a real-world community issue aligned with the United Nations Sustainable Development Goals (SDGs). This project required us to think critically as a multidisciplinary creative studio—combining UI/UX, graphic design, animation, and visual storytelling—to identify a problem, justify its relevance, and craft an art direction concept that could create meaningful social impact. Our team selected SDG 10: Reduced Inequalities , focusing specifically on the growing issue of emotional miscommunication caused by shifting emoji meanings across cultur...


Comments
Post a Comment