Experiential Design Task 1
Melvin Yung Khun Yew | 0357241 | Bachelor of Design (Hons) in Creative Media
MMD 60204 | Experiential Design
Week 1 — Week 4
Task 1: Trending Experience
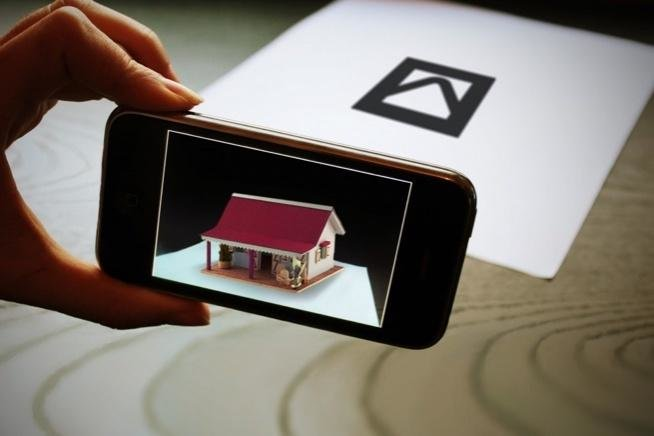
As I delved into the world of augmented reality (AR), it really amazed me how far this technologies go and achieves wonderful experiences that I believe it should be explored more to incorporate this technology well into real life.
 |
| Image by Blippar |
These are the jump links to each part of this portfolio
Instructions
Mr Razif Mohammed, my lecturer for the Experiential Design module for this April 2025 semester, gives us a heads-up on the upcoming tasks and exercises.
Lecture
Mixed Reality (MR) is a more advanced technology that blends both the physical and the virtual content together to be interacted with in real time. One key example of technology utilizing the MR is Microsoft HoloLens, that have since provided benefits to various expert fields like healthcare or manufacturing. However, Mr Razif mentioned that AR and MR are very closely related, with both of them having the same function to overlay digital content to the real world. The only difference is the way to interact with the contents with AR using physical buttons or controllers, while MR can be more intuitive to use hand gestures to control the contents.
Virtual Reality (VR) is essentially making users immersed into the full digital environment, snapping relations with the physical world.
Mr Razif also extends further to guide us on the project deliverables in this module by showing past student works on YouTube about the AR (Augmented reality) experience, giving us ideas on what to expect and the product outcome for this semester.
 |
| Experiential Design AI Assistant by Mr Razif |
- Marker-based
Image by Krit Salah-ddine - Markerless
Image from 3D Cloud - Location-based
Image from WebAR Studio

| Image by Nielsen Norman Group, User Map Cheat Sheet 2017 |
Reflection on Other AR Experiences
After receiving feedback from my lecturer to add my research on AR experience, I took time to explore different AR (Augmented Reality) experiences that are available in the real world. This helped me understand how AR is used in various industries, and it also inspired me with new ideas for my own exhibition concept.
One of the first AR experiences I explored was the IKEA Place app. It allows users to place virtual furniture in their own home using markerless AR. I was impressed by how accurate the 3D models were in terms of size, lighting, and shadow. The way the app detects flat surfaces and anchors the furniture made me realise how powerful spatial AR can be for interior design. It gave me ideas on how virtual cultural objects can also be “placed” inside museum spaces using the same technology.Ikea Place by Norgram Co

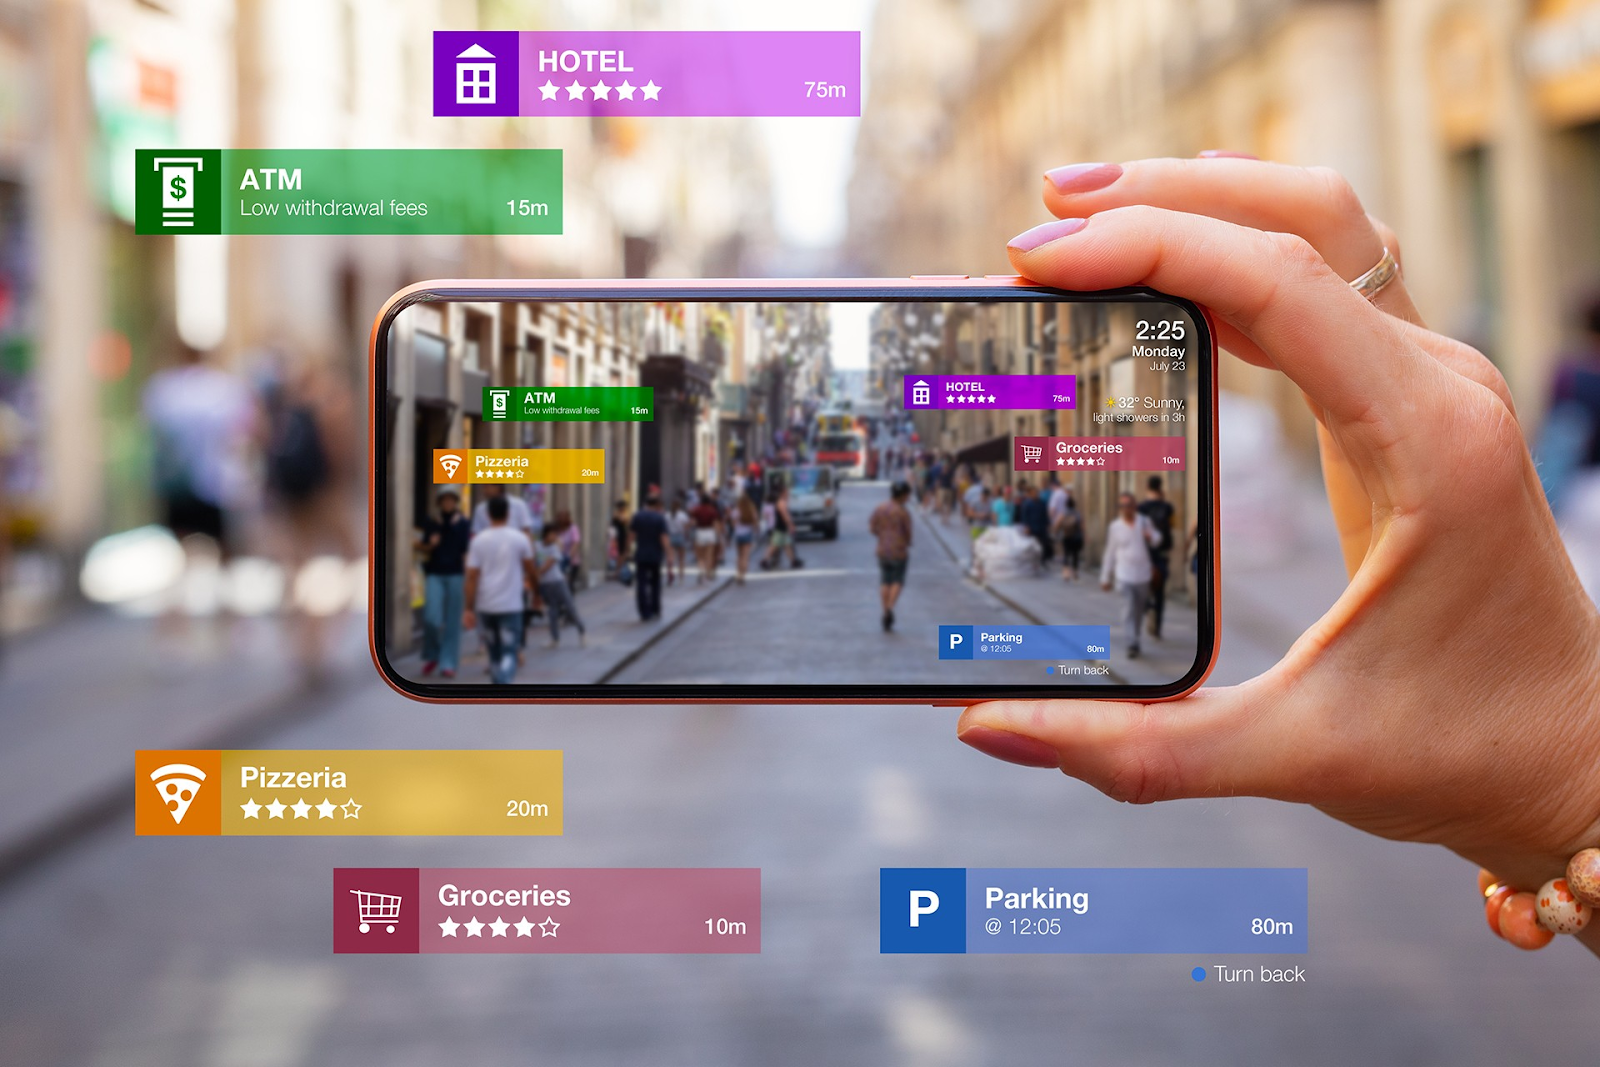
Next, I read about Google Maps Live View, which uses location-based AR. When people use their phone camera for navigation, arrows and direction labels appear on top of the real-world streets. I found this type of AR interesting because it connects the virtual world with real locations. I imagine that for a Malaysian cultural exhibition, visitors could explore heritage sites like Melaka or Penang with AR storytelling guiding them in real time.AR Experience with Google Maps Live View

Another example I found was Snapchat’s AR Lenses. While it seems casual or playful at first, I noticed how creative and interactive the filters are. Some lenses allow you to transform your environment, interact with objects, or play mini games. It helped me realise that AR can be fun and still educational if designed the right way. If cultural motifs or traditional clothes were used in AR lenses, it could attract younger audiences and make heritage more relatable.Snapchat AR Filter

Finally, I looked into TimeLooper, an AR app used in tourism. It recreates historical events when users visit certain landmarks. This idea really inspired me, because I think Malaysian culture also has rich stories that could be visualised through AR, especially in museums or historical cities.AR Historical events played on screen

Through these experiences and research, I now understand that AR is more than just a tech feature—it’s a tool that can enhance storytelling, education, and cultural appreciation. These real-world examples helped me reflect on how I can apply similar ideas to my own project, while keeping the content meaningful and culturally respectful.
Work Process
This work process section is divided into 3 parts, consisting of:
- In-class exercises
- Self research
- Idea proposal
In-class exercises
Week 2
To have us understand and utilize what we've learn in lecture class, Mr Razif started a group activity to have us create a user journey map of a person's journey on specific locations like a cafe or even a theme park. Thus, I work closely with my team to select Disneyland Tokyo Park as our location focus, and then we further brainstorm what the possibilities are when someone travels to Disneyland. To set up a standard user journey map, we make sure to include gainpoints, painpoints, and solutions for the painpoints according to each journey progression.
Week 3
For the first half of the exercise, Mr Razif initiates a session to let us imagine a scenario where the AR experience can be applied and what extended visualizations can be useful for this. To conduct this activity, I teamed up with other students to come up with a scenario in a hospital.
This exercise enables me to visualize and ideate what the possible ways are to implement an AR experience into hospital settings, by account different audiences, like the patients who are more visually-oriented rather than the conversations with doctors, and doctors who can utilize AR technology to help the patients reach a consensus with doctors, and deliver the messages across to patients more effectively.
Later, Mr Razif introduced us to Unity, one of the key applications we will use to create an AR experience to equip our students with the necessary knowledge about creating AR experiences, starting with the marker-based AR. By teaching us the required plugins like Vuforia, which enables us to import the AR functionality into Unity to create a working and responsive AR.
During Mr. Razif's experiential design tutorial, he guided us step by step through the process of setting up augmented reality using Vuforia in Unity. After we completed the registration, our first task was to download the Vuforia Engine package and bring it into our Unity project. From there, we accessed the Vuforia Developer Portal, where we had to create a brand new database. In that database, we uploaded the images we wanted to use as markers—these would act as the visual triggers that the AR camera detects to bring digital content to life.
One key takeaway Mr. Razif emhasized was the importance of choosing high-quality images. He pointed out that Vuforia gives each image a star rating based on how well it can be tracked—factors like contrast, detail, and overall sharpness affect this. We were told to make sure our images had at least a 3-star rating because anything lower might cause recognition issues during the AR experience, which would affect how smooth or immersive the interaction feels for users.
 |
| Image rating on Vuforia |
While I imported the same image I uploaded on Vuforia as a recognition target for AR, I also added a 3D cube model on top of the image and under the child of ImageTarget (added from the VuforiaEngine options), preparing for the camera scanning later to trigger the visibility of the cube when the image is in camera view.
 |
| Import the image target from Vuforia |
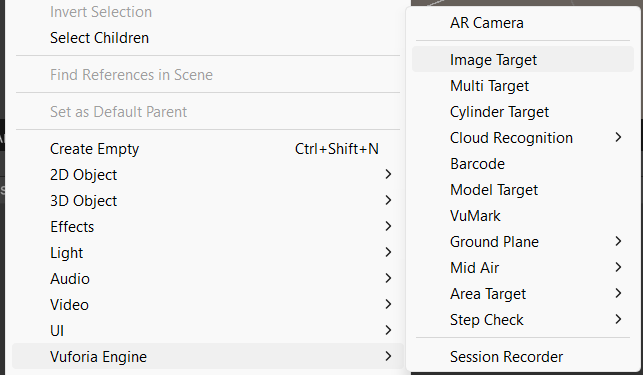 |
| Image Target features from Vuforia Engine |
 |
| Adding a 3D cube |
 |
| Group and nest the cube on the image target |
To add the camera scanning AR features to Unity, Mr Razif guided us to add the Vuforia license key in the Vuforia Engine configuration in Unity.
 |
| App license key requirement under the Vuforia Engine configuration tab |
By creating a license profile, copying and pasting the license key from Vuforia into the Unity, it enables the AR features to be used in Unity.
 |
| License Key on Vuforia |
But as my webcam on my laptop is broken, I tried to use the Camo app to substitute the webcam by using my Android phone as camera. During the process, I've met with many problems arising from that option such as the camera not registering in Unity. I have to go all the way into the Project files to look for the webcamprofiles.xml to register Camo with a default webcam profile for it to work properly in Unity.
 |
| File Path and Webcam Profile coding |
And then, voila!
Week 4
 |
| Canvas features in the UI panel |
In a UI design, a button is the simplest element for a working UI, enabling users to interact with the screen. Thus, I added a button feature nested under the canvas while adding commands to each button to hide and show the cube.
 |
| Adding a button on the canvas |
 |
| Adding commands for the buttons to set the active state of the cube model |
For the users to have visual feedback when hovering over the button, the button colour state can be edited at the button configuration panel.
 |
| Button state |
Here is the outcome of hiding and showing the model using the button:
 |
| Key frame animation |
Here is the outcome of starting and stopping the animation using the button:
Ideation Proposal
- Maps (Navigation-based app)
- Store (Shopping-based app, when in store, scan an item to show its 3D model/price/any related description)
- Education-based app
 |
| Pop Mart, Image by Shuango Zhang |
 |
| PC components |
My reflections
Reflecting on Task 1, this has been a meaningful introduction to both augmented reality technology and user-centred experiential design. Although I did not encounter any major challenges during this phase, I was genuinely amazed by how AR can be integrated into daily life in such practical and creative ways. Exploring examples like Pokémon GO or educational tools helped me realise how AR bridges the physical and digital worlds to enhance real-life experiences — a concept that was previously abstract to me.
This semester also marked my first time using Unity and Vuforia, and while the tools initially felt unfamiliar, Mr. Razif’s guidance made a big difference. His step-by-step explanations and in-class support allowed me to grasp the technical foundations quickly and with growing confidence. Setting up AR marker tracking, integrating UI buttons, and even animating objects within Unity helped me gain a hands-on understanding of how immersive experiences are built.
When it came to idea generation, I found it relatively easy to think of concepts based on my personal interests and daily observations. However, translating those ideas into structured proposals and mockups was more challenging. It pushed me to be more deliberate in communicating interaction flows, user needs, and visual design — skills that are essential for any designer.
Overall, Task 1 has not only helped me build technical skills but also strengthened my ability to think like a designer: to see problems, understand users, and craft interactive solutions that feel meaningful and intuitive. It has been an engaging and empowering start to this module, and I look forward to developing my ideas further into a working prototype.


Comments
Post a Comment