Illustration and Visual Narrative | Task 2
Week 6 - Week 8 (30/10/2023 - 20/11/2023)
Melvin Yung Khun Yew | 0357241 | Bachelor of Design (Hons) in Creative
Media
COM 61304 Illustration and Visual
Narrative
Task 2
This portfolio consists of:
Click on the link to jump to that part of the portfolio
Lectures
↑↑↑ Back to top ↑↑↑
(Recap) Week 5 - Chiaroscuro
In week 5, Mr Hafiz led us to try tracing out a man's silhouette and
replacing the shadows into images with patterns. Guiding us on how to use
the clipping mask to replace the dark shadows.


Select the reference image and dim the layer to 50% after selecting the
image as a template.

|
| Trace out the outline of the targeted man |
The next step is to compound all the shadows into a single compound path in Object > Compound Path (Adobe Illustrator)
After that, clip the compound path of shadows with the patterned image I
found on the internet which is interesting.

|
And there you have it!

|
|
Clipping mask of pattern on the shadow |

|
| Background darkening to see the details better |
Week 6
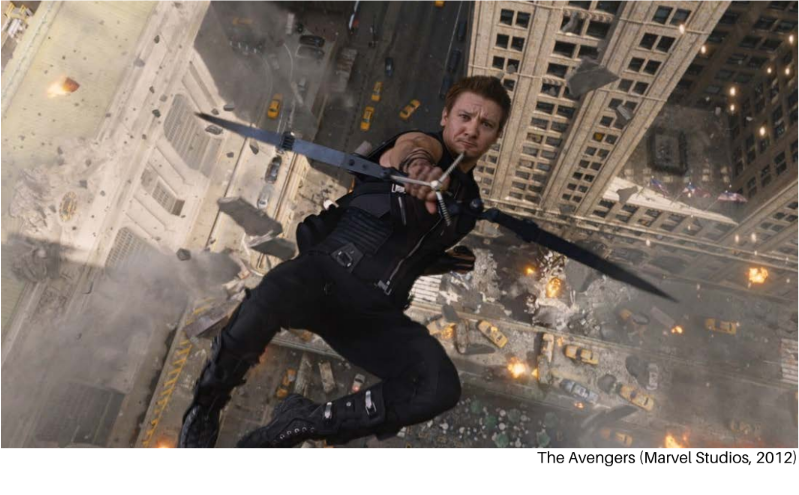
Composition Theory: Visual Types and Shots
The composed shots should consciously arrange the focus of the scene to
stand out.

|
| The Grand Budapest Hotel by Wes Anderson, 2014 |
The basic composition visual rules:
-
Visual narrative
Visuals in the scene complement all aspects of the narrative
Complementing subject focus and reflecting the narrative

-
Visual flow
A clear flow of visuals that directs the viewer's eyes
Compositions that determine the path of a viewer's eye through the visual

-
Visual balance
Visuals in arranged to balance the composition of the scene
Nudging things one way or another even when you can't guarantee the exact view path

-
Visual hierarchy
The visuals are arranged in a way that directs the viewer's eyes to specific details first
Visualize and focusing on the subject matters can affect the composition and even affect the course of history :)

Types of shots:
-
Establishing
Wide shots are often used not only to establish the settings but also to portray the spectacle and chances for audiences to savour the splendour and grandeur of a location while giving enough info to process what's going on.
-
Bird's eye view
Or a so-called overhead shot.
-
Frame within a frame
It can fracture the screen space, add depth and create visual interest in the cinematic compositions. When choosing to use foreground or background to create the effect, this technique can emphasize and highlight the underlying meanings within a story and break up the information in the frame for maximum impact.
-
Medium shot
Or the so-called three-quarters shot which frames three-quarters of the characters. It is an in-between of a close-up and a long shot.
-
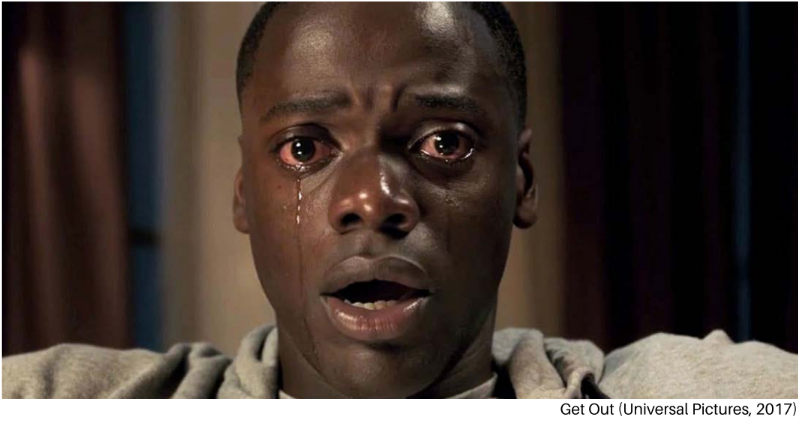
Close-up shot
This shot can intimate a moment, a look into a character's mind and allow us to catch the emotions and thoughts in a grander context.
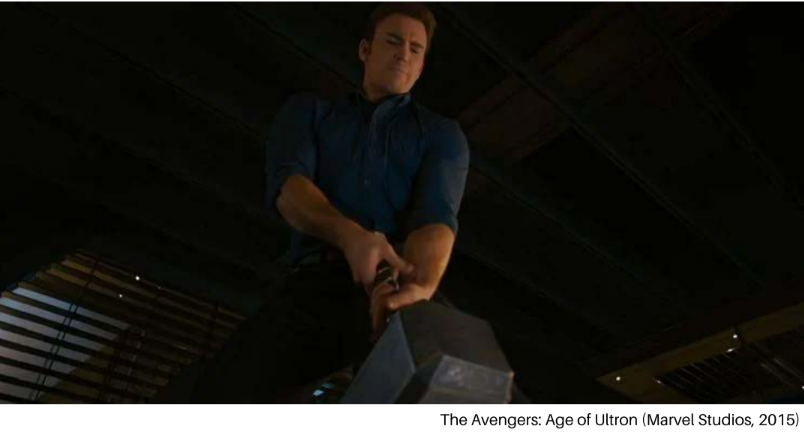
-
Worm's eye view
It is a low-angle point of view looking up from the ground level. It is used to emphasize either actions or objects together with the characters.


Week 7 Tutorial Exercise
Transparency gradient and noise texture
Transparency gradient


I changed the solid colour shape to a black-and-white gradient colour shape.

Cut the gradient rectangle and place it into the subject's layer mask in the Transparency panel (Ctrl + Shift + F10)

The transparency gradient is done!
Layer mask theory: White part =Visible, Black part = Transparent
Noise Texture
Firstly, I duplicated the subject layer and made a compound path for the
subject to group the separate parts together for easier gradient
matching.

Later, I selected the gradient and applied the noise texture from the
Effect panel then Texture later Grain.

Lastly, decrease the opacity of the noise texture layer down to 20%

And we're done!
Week 8
Independent Learning Week - No lecture class
Instructions
Work Process
Initially, I want to show the danger signboard in the middle of the forest with scratch marks on it to symbolize the unknown creature inside the inhabited forest. However, that doesn't show anything related and how it connected to the urban legend of Bigfoot due to the lack of evidence and details.


Feedback
Reflection
Instructions
↑↑↑ Back to top ↑↑↑
Mr Hafiz gave the class briefing on this whole module and the
module learning outcomes through the online Microsoft Teams
meeting.
Task 2 (20%) - Individual: Decisive Moment
For the second task, I'm instructed to do an editorial illustration with animations to enhance it, which is specially produced for newspapers, magazines and websites that add a visual dimension to a piece of writing. From the assignment brief, I know that these editorial illustrations are crucial to grab the reader's attention when published while adding a new perspective to the article. Thus, it's safe to say that this assigned task aids and benefits me in gaining theoretical and practical knowledge in illustration and visual narrative to inform and provide me with the necessary experience to take on this module.
For the second task, I'm instructed to do an editorial illustration with animations to enhance it, which is specially produced for newspapers, magazines and websites that add a visual dimension to a piece of writing. From the assignment brief, I know that these editorial illustrations are crucial to grab the reader's attention when published while adding a new perspective to the article. Thus, it's safe to say that this assigned task aids and benefits me in gaining theoretical and practical knowledge in illustration and visual narrative to inform and provide me with the necessary experience to take on this module.
Submission
- Decisive moment illustration (Urban Legend)
- Limited animation
Learning goals
- Generate and communicate design concepts and solutions through manual and digital skills effectively and skillfully.
- Use creative thinking skills and methodologies to explore, generate and test a wide range of conceptual ideas.
- Use information and communication technology to source navigate, select, retrieve and manage information.
Work Process
↑↑↑ Back to top ↑↑↑
Ideation
I initiated this task by beginning to conduct some research on the urban
legend to choose for the decisive moment in an editorial illustration.
After sessions of browsing the Internet, I came across articles
mentioning one of the famous urban legend creatures, Bigfoot (or
so-called Sasquatch).

|
| "Fake" photo of Big Foot (Sasquatch) taken in 1967 |
As requested by Mr Hafiz to ideate and sketch out the illustration
before and after the decisive moment, I understood that this is better
for us to be aware of what details that is important for portraying a
story out of an illustration in order to pique viewers' attention.

|
| First (Left) and second (Middle) version sketch of Bigfoot |
Initially, I want to show the danger signboard in the middle of the forest with scratch marks on it to symbolize the unknown creature inside the inhabited forest. However, that doesn't show anything related and how it connected to the urban legend of Bigfoot due to the lack of evidence and details.
I also tried just showing an illustration about a person's close
sighting of Bigfoot when throttling in the forest, but I rejected the
second version after inquiring my lecturer and realized that all the
Bigfoot sightings remain mysterious and only existed in the photos that
were always shotted far from the creature.

|
| Final approved illustration of the mysterious "Bigfoot" creature in a boreal forest. |
Sketch, Rationale, Moodboard and Reference


During this assignment, I tried using the all-new artificial
intelligence (AI) tools to simply illustrate what an Art Deco style with
the minimalist design language of a campsite in the middle of a boreal
forest looks like.
Keywords: Boreal forest, Destroyed campsite, Footprint trails.

|
| AI-generated illustration |

|
| Reference image by Anderson Design Group |
Inspired by the tent's colour usage and design, and the composition of
foreground, midground and background from the reference image I found
online, I decided to create an illustration by utilizing the newfound
ideas.
Finalized illustration with wireframe
In the illustration, I also tried to add textures to the objects and
scenes using the noise texture filter to enhance the overall visual.
 |
| Noise (Stippled Grain) texture effect |

|
| Design of a dark figure (Bigfoot) hiding in the background with footprints |
Animation
For the animation part, I decided to use frame-by-frame animation to
make the still illustration into an animated GIF
I also planned to animate the smoke from the extinguished campfire, the
light reflection detail on the ground, the mysterious figure (Bigfoot)
and a finishing fine-detail touch of a swarm of bats flying out of the
scene.
Firstly, I animated the frames one by one inside the Adobe Illustration.

|
| A total of 51 animation frames |
Later I exported all the artboards to separate images to compile them
together in Adobe Photoshop and create the animation timeline to export
it as a single animated GIF.
↑↑↑ Back to top ↑↑↑
Final Work

Artist Statement
Looking back on the history of how the story of the Bigfoot (Sasquatch) first emerged until now, we still cannot grasp hold of solid evidence that confirms its existence, that being said tons of blurry pictures and noise-filled videos of creatures in the wild forest on the Internet. I came to a resolution on inserting mysterious elements into this editorial illustration by placing the creature in the cool colour background to reduce the focal point on it, as well as targeting the warmer colour midground of a sabotaged campsite to direct the viewer's attention away from the mysterious figure. Who knows whether the camp was attacked by wild animals or is it another mystery awaiting us to find out its truth?
Feedback
↑↑↑ Back to top ↑↑↑
Week 6
General feedback
After selecting your urban legend to work on, be sure to read,
understand and note down the keywords in the urban legend articles
before starting to sketch out your ideas.
Week 7
General feedback
The first and second versions of the sketch don't really show out what
is the decisive moment or turning point of the story in the
sketch.
Specific feedback
Try adding more details to support the story happening in the
background of the illustration. The Bigfoot urban legend can be
interpreted as a mysterious creature as it only appears in low-quality
photos and videos, plus no real evidence of close-up contact with the
"Bigfoot" creature. Thus, you can try to implement a mystery element
into your illustration.
Week 8
No feedback - Independent Learning Week
Week 9
Specific feedback
"It looks good" "Good job" — Mr Hafiz Zamri, 2023
Reflection
↑↑↑ Back to top ↑↑↑
-
Experiences
From searching for a suitable urban legend story I'm interested to the process of ideating out and sketching the composition of the illustration with the knowledge of the importance of keeping the foreground, midground and background in mind. I had a lot of fun moments during this whole assignment on creating the poster.
-
Observation
In my spare time, sometimes I look up on Pinterest watching and admiring other professionals' work. The amount of knowledge and time they put into their work is what I can't imagine. Moreover, Mr Hafiz patiently taught and guided us on the features and functions of Adobe Illustrator, I believe I can see a better version of myself compared to when I was still in the Foundation in Design course at Taylor's College. Furthermore, gathering info from Mr Hafiz and utilizing it through the assignment is great for developing and refining my skills in using Adobe software.
-
Findings
I found a lot of cool info that piqued my interest in how to create successful editorial illustrations and be mindful of the background details that can contribute to the overall storytelling of an illustration through visual graphics only.
Comments
Post a Comment