Digital Photography and Imaging | Task 2
Digital Photography and Imaging September 2023
03.11.2023 — 01.12.2023 (Week 6 — Week 10)
Melvin Yung Khun Yew | 0357241 | Bachelor of Design (Hons) in Creative Media
GCD 62104 Digital Photography and Imaging
This portfolio consists of:
Click on the link to jump to that part of the portfolio
Week 6
Theme — Texture Displacement

Adobe Photoshop > Filter > Distort > Displace (only works with PSD
files and black and white)
Smart filter (Convert to smart filter) allows
to edit the filter applied to a smart object
Tutorial Exercise
In the week 6 lecture class, Mr Martin taught us how to displace an image onto
another texture of a picture to merge them together naturally.

|
| Displacing the Malaysia Flag on a wrinkled fabric |
To start off, I selected the fabric image in JPG format as the main subject for displacing the flag.


Setting fabric as the main subject and the flag as the displacing object
To prepare the main subject for the displacement effect, I turned the
yellowish fabric into black and white colour using the filter adjustment
layer. At the same time, I also applied some smooth effects on the fabric
layer to unsharpen the pixels of the jpg.
|
|
| Black and white adjustment layer on the fabric layer. |
Later, I saved the black and white file separately to act as a reference PSD file for displacement use.

|
| Saving B & W file for reference |
Moving on to the main part of this exercise, I imported the photo of the Malaysia flag into the same PSD project file and converted it to a smart object by right-clicking on the layer and selecting the option.

|
| Convert to smart object for easier editing on any changes (filters, effects)applied to the layer. |
Under the Filter panel, I selected the displace filter effect inside the distort option.

I chose the black and white reference image of the fabric I made before as a
displacement map for the flag.

Voila! ☻

I also continue practising on the other samples and materials provided by Mr Martin to further hone my skills with...
 ►
►

Week 7
Theme — Cyborg Girl
Tutorial Exercise

Mr Martin instructed the class how to create a cyborg-like effect on a person using the Bevel and Emboss effect and adding robot parts to the leg.
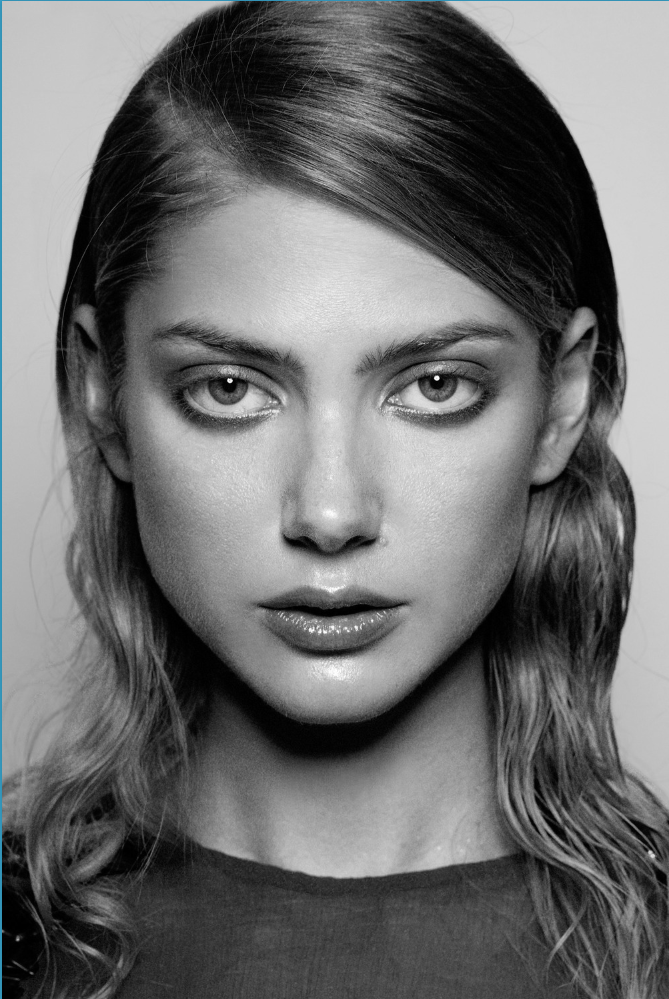
Firstly, I selected Bora the girl as the main subject for the cyborg transformation.


|
| The metal structure of a robot |
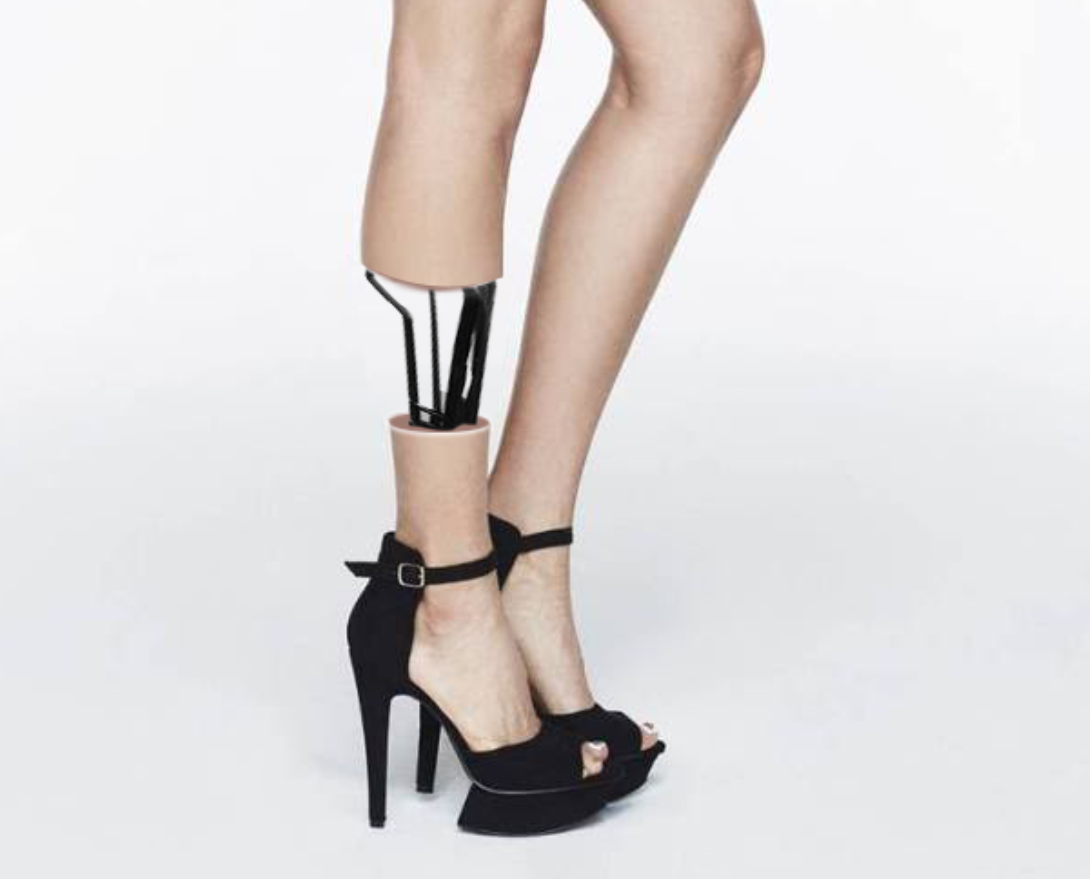
|
| The finished product of a metal skeleton on the leg |
Moving on, I began to construct the lines on Bora's thigh to simulate a cyborg modification. Using a brush tool to draw line patterns on the thigh and add them to a layer mask onto Bora, I went to the blending options panel in the popped-out-layer style window by double-clicking on the layer with Bora.

I adjusted the settings of the bevel & emboss structure including the style, depth, size and the shading of the effect.

Finished!
Week 8
Independent Learning Week
There is no lecture class on week 8, but I continue progressing on the second assignment tasked by Mr Martin for this module.
Week 9
Portrait Mask with Ivy Bush

Things learned:
- Blending Options > Bezel & Embross
- Bezel & Embross > Create Layers (Separated parts of bezel highlights and shadows)
- Select > Load Selection
↑↑↑ Back to top ↑↑↑
Instruction
Mr Martin gave the class a quick briefing on this whole module and the
module learning outcomes during the class on Friday afternoon.
Task 2 (40%) - Individual:
In this second task, I was tasked to make a double-exposure photo using a portrait photo of myself and layers of background images to create a compound image.
In this second task, I was tasked to make a double-exposure photo using a portrait photo of myself and layers of background images to create a compound image.
The next task given to me is to create a digital imaging
photo-realistic picture by combining two different objects/subjects
together to a final image.
Submission
Digital Photo Manipulation and Double Exposure
Digital Photo Manipulation and Double Exposure
Learning goals
- Generate and communicate design concepts and solutions through manual and digital skills effectively and skillfully.
- Use creative thinking skills and methodologies to explore, generate and test a wide range of conceptual ideas.
- Use information and communication technology to source navigate, select, retrieve and manage information.
↑↑↑ Back to top ↑↑↑
Work Process
Double Exposure Photo
I started the photo editing process by first taking some portrait photos
of myself with the helping hands of my wonderful classmates.
Upon making a final choice of which portrait photo to use, I began to
search Google looking for materials and assets for the double exposure
task. Then I came across these spectacular photographs of nature.


"Nature at its best, innit?"
I started by importing all the assets into Adobe Photoshop and creating a layer mask for the subject. I also cleaned up the layer mask and erased some parts to fit the subject better in the photo for the double exposure editing later.

Afterwards, my next step was to create layer masks on the nature assets
for a double exposure effect with brush tool adjustments following the
arrangement of my portrait photo.

I began adjusting the overall visuals to make them more appealing, such as the exposure curve, black and white filter, and gradient map on the subject.

|
| Exposure curve adjustment |

|
|
B & W filter and gradient map adjustment |
Ultimately, I added the background gradient colour to finish up the double-exposure photo.

Initially, I planned to include some mathematical equation patterns in the background to clarify the characteristics.

However, after a nice feedback session with my lecturer, I soon began to realise that this pattern addition could mess up my photo theme, as the theme of the subject already leaned more towards nature, and that this patterned background could break the harmony of the whole image.

|
| "Man In Suit" — 10/11/2023 |
Photo Manipulation
In the second part of this assessment, I was tasked with the
manipulation of real-world objects together to form a single compound
photo. After going through the examples provided by Mr Martin on what to
expect in this second part of the task, I began to ideate and illustrate
out some concepts without hesitations.

Photo Manipulation Concepts — 2/11/2023
Tennis ball and orange
I found some high-definition of tennis ball images on the Adobe Stock
website to be used as the main subject of photo manipulation.


Subsequently, I selected the tennis balls and removed the background
after importing them into Photoshop. Later after a thoughtful session, I
decided to change the original idea of using orange to using the
mandarine fruit as the target for photo manipulation.
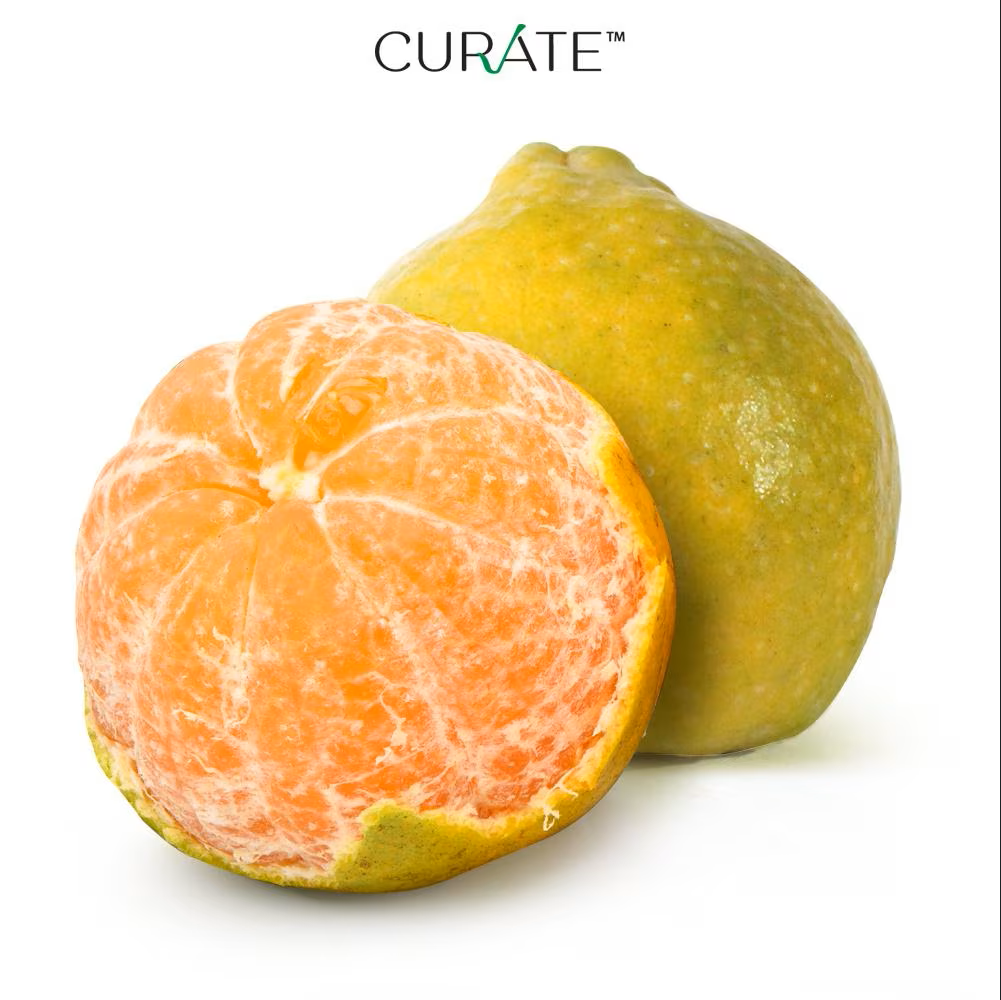
Selecting out the part I would use for the mandarine, I slapped the
photo onto the tennis ball with the addition of background colour and
reflections.

However, I also made another concept out which apparently Mr Martin is more preferred because of the awkward mismatch of the half-cut tennis ball and the mandarine fruit.
Ladybug with strawberry texture shell
Same actions as the last concept, I searched for a suitable ladybug
image and a strawberry photo for the task.


Importing them into Adobe Photoshop, I select the strawberry and cut out the remains for distortion on the ladybug's elytron. I also applied overlay blending mode on the distorted strawberry to make it look natural.

My final step is to add the finishing adjustment layer on the photo including exposure curve adjustment and colour grading for the colour of the strawberry to fit better with the surrounding light direction shone on the elytron.


|
|
"Strawberribug" — 15/11/2023
|
↑↑↑ Back to top ↑↑↑
Feedback
Week 6:
Specific feedback
Double exposure: for the man in a suit, the background can be quite
confusing as it has a different theme than the double exposure, try
switching it to a background that matches the theme of the picture.
For example: on a mountain gazing at the vast universe and spaces,
endless horizon of forest or ocean.
The second image, it's more digital imaging than a double-exposure
photo. But keep it for future use too.
Week 7:
Specific feedback
For the combination of a tennis ball and mandarine, it feels weird to
have a whole mandarine fruit meat to expose outside, rather I believe it
is more suitable to use a cut-flat orange to fill the inner part of the
tennis ball up.
For the combination of the ladybug and the strawberry, I believe it is
much more natural to just blend in the texture of the strawberry on the
body of the ladybug, so it's better to use multiply blend mode. But in
the end, it's up to you to decide.
↑↑↑ Back to top ↑↑↑
Reflections
-
Experience
Talking about the fascinating journey I experienced in the second assessment of this module, I got to see the different photography techniques and how to achieve them using Adobe Photoshop. From the double exposure and photo manipulation task, I realized that I can bring photography to the next level not only by the real-life photoshoot using the camera but also by including a creative mindset into the photo that we can't hope to achieve in normal circumstances.
-
Observations
As instructed and requested by my lecturer to have a look at the examples on the Internet, I'm able to appreciate the enthralling work of art by the professionals, they make me wonder how capable our human mind is.
-
Findings
Not only the information from the module can help me achieve a greater height in my creative design voyage, but the experiences and samples portrayed by others make me realize that there is always someone more capable and stronger than us, all we can do is not hoping for the best, but wishes for improvement as times goes.


Comments
Post a Comment